

RecRoomMasters
The $1,095 Arcade Cabinet That Costs $1,195 Once You Add a Trackball
Nov
Ask ten arcade owners what they paid and you’ll get ten different answers — because the cabinet starts at $1,095, and the display, controls, and freight decide what you actually pay.
Why There Is No Single Price for a Home Arcade Cabinet
A home arcade cabinet is not a product with one sticker price. It is a stack of decisions. The display, controls, shipping, and software change the total more than any single component, and the price you see quoted often omits the parts you still need to buy. Small choices — a different panel, a brighter screen, a better joystick — move the number in ways that are not obvious until you compare two quotes side by side.
- Cabinet shell — panels, material, finish, and hardware.
- Display and electronics — monitor, encoder, cabling, and power.
- Controls and wiring — sticks, buttons, specialty controls, and harnesses.
- Logistics — shipping, duties, and after-sale support.
Home cabinets and commercial coin-operated machines are separate product categories, so retail pricing for one does not transfer to the other. Choose the right category first, then compare like with like. A cabinet’s price is not a single figure; it is a readout of cost drivers that put the total in a range determined by the choices detailed in the sections ahead.
Cabinet Style and Size: The First Big Cost Fork
Style and size set the floor and ceiling for everything that follows. Bartop and desktop cabinets usually anchor the low end by reducing panel count and weight, while full-size uprights and sit-downs consume more material and more floor space. A bartop is still a complete machine, but it is not a piece of furniture, and its price reflects that. For classic vertical arcade games, the screen is the dominant cost driver and rarely negotiable — the cabinet follows the screen, not the other way round. For full-size upright cabinets, the cabinet itself is the dominant cost driver.
Cocktails and sit-down cabinets deliver a social experience at mid-to-high cost: two players, mid-to-high panel count, and a more complex base, with the tabletop design pushing materials and labour above a bartop. Full-size uprights deliver the full visual impact and a console-quality panel at the cost of size, weight, and materials. They are the most expensive style because they are the biggest — more panels, more material, more machine.
Price changes when a new feature is introduced or when a category shifts. Entry-level assembled units share the same panels and materials as their premium counterparts, but the premium ones are a different product category — a different class of machine built around the same panels. The link to your wallet is direct. Panel count, material volume, and finished weight drive both the build cost and the shipping bill.
Cabinet Material and Build Quality
Substrate choice sets a ceiling on everything above it. Industry practice holds that MDF is dense and easy to finish, plywood is more impact-resistant, PVC offers moisture tolerance, and premium hardwoods carry a premium — not only for appearance but because the material shapes the feel, finish, and longevity of the cabinet.
The finish you see is only the start. T-moulding and edge banding protect panels, powder-coated and painted metal carries different durability, and marine-grade plywood is specified for humid settings. These are genuinely different products with genuinely different prices; it is not a choice between a laminate and a laminate look. A cheap choice at the substrate stage can cost more later in replacement costs — a mistake nobody wants to make when an arcade machine is meant to last a decade or longer.
Many builders find that joints, edges, and hardware show wear before electronics do, and that pretence of durability is wasted when a cabinet’s real failure mode is a door that sticks or a side that warps. Choose materials that stand up to use, not just to unpacking. When a part will be touched every session, the material matters more than any other decision.
The Display: The Quiet Budget Multiplier
The shell sets your ceiling, but the display quietly sets how often you actually play. A crisp, responsive screen is the difference between a cabinet that sees daily use and one that becomes a side table.
CRTs are prized for authentic scanlines and minimal input lag, but they are heavy and aging, and hard to source new. They are not a practical choice for a modern home, but they are a reminder that the choice of screen is not only about resolution — it is about how the game feels.
Many players instead choose a modern LCD paired with a low-latency gaming mode or a dedicated scaler, though timing precision varies substantially between models. The technology is cheaper, lighter, and easier to replace, but not every panel renders fast-action games with the same fidelity.
Aspect ratio also shapes the bill. A 4:3 panel reduces letterboxing for classic titles, while a 16:9 widescreen is common and inexpensive but will show bars on a game designed for the older ratio. Pixel density and refresh rate further divide panels into different price tiers, from a serviceable 1080p display to a high-refresh 1440p panel with noticeably smoother motion.
Vertical shooters add another cost through the rotating mount, extra brackets, or second monitor needed to display them properly. A game that asks the screen to turn is a game that asks for more hardware.
An integrated monitor guarantees fit, mounting, and cable routing; bringing your own screen saves money but adds compatibility risk and the hassle of sourcing, measuring, and mounting. Many builders spend more on the screen precisely because it is the part you see most. Shaders, scanline generators, and bezel overlays are inexpensive software or small-hardware fixes that take a modern display closer to the arcade look without replacing the panel.
Controls and Parts: Where Feel and Price Are Set
The display sets the picture; the panel sets the feel. Joysticks and buttons are the parts you touch on every game, so they are the parts where quality is most audible — a mechanical snap versus a mushy press is the difference between a satisfying game and an unsatisfying one.
Joystick choice drives both feel and cost. Microswitch sticks are the most accessible entry and the default in most kits, while leaf-switch designs sit in the mid-tier and optical or magnetic sensors mark the beginning of the premium range. Brand-name switches cost more than generic parts, and the top tier is where professional-grade components live — genuine Sanwa buttons and joysticks, for example, hold their feel across thousands of sessions.
Buttons follow the same pattern. Generic microswitch buttons are cheap and cheerful, while premium brand-name switches cost more. Convex versus concave affects comfort far more than price, so this is one place where preference is free.
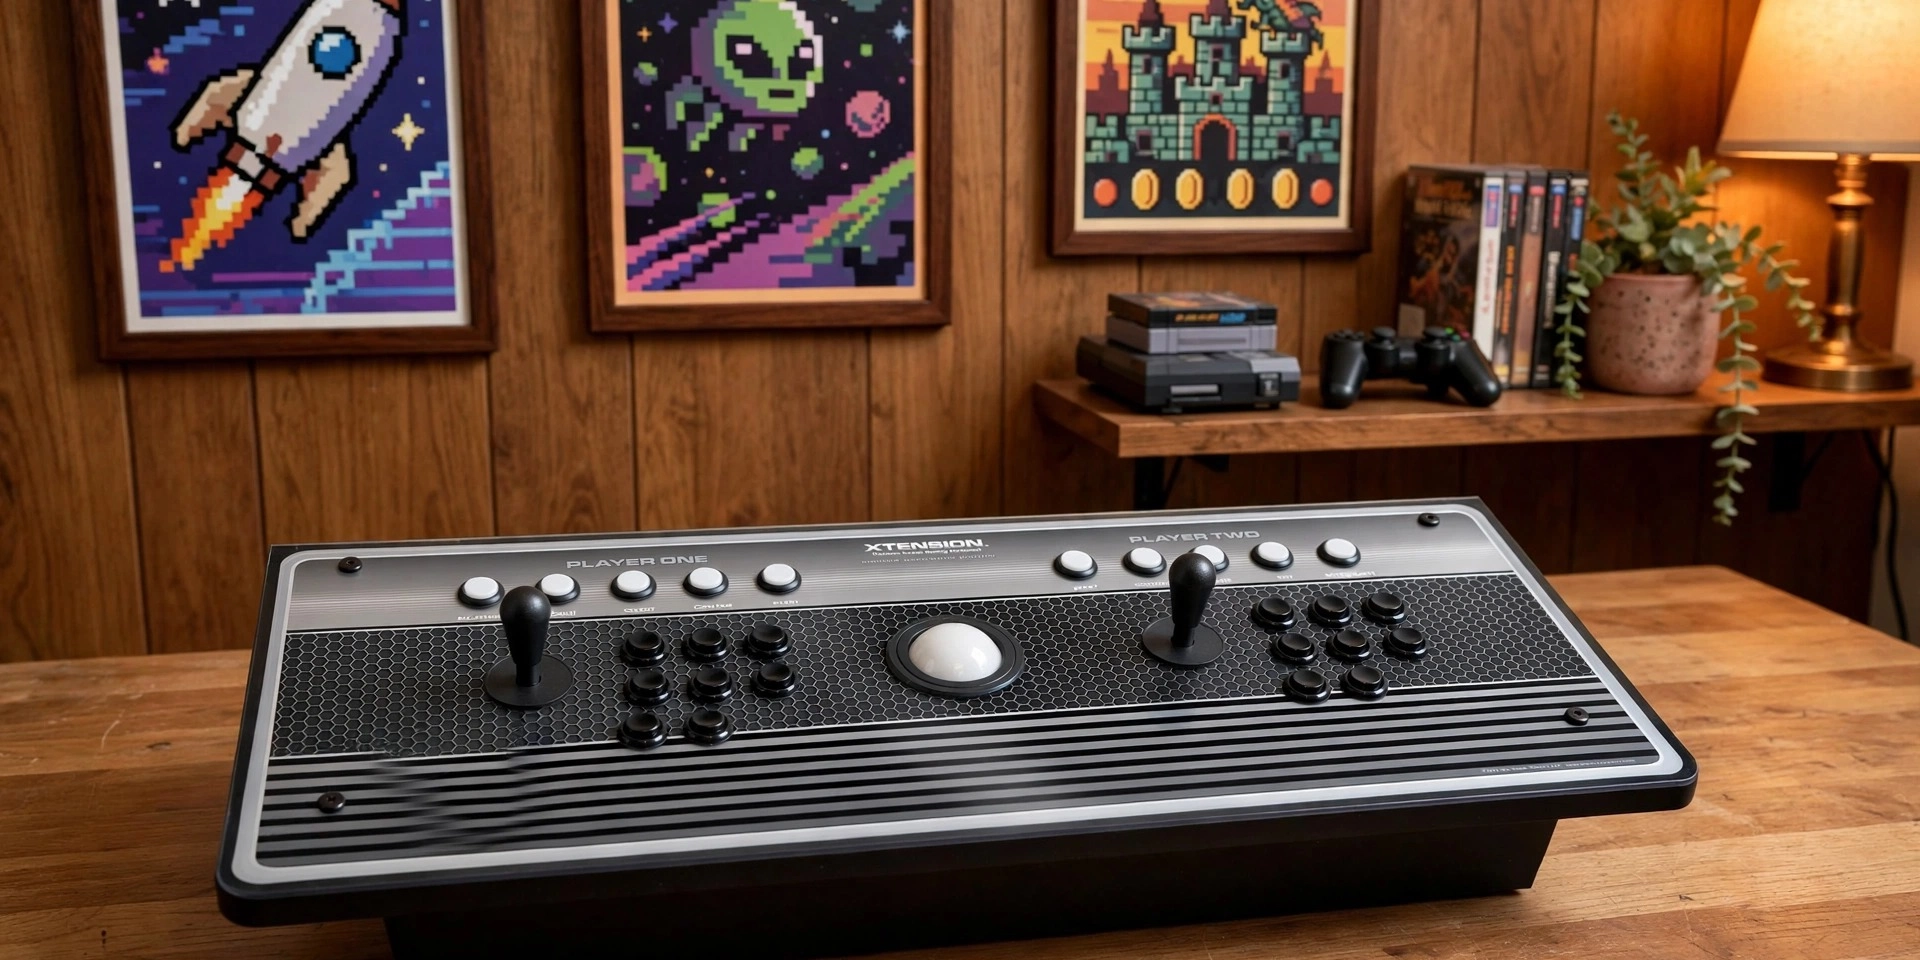
Other controls escalate fastest. Trackballs, spinners, and dedicated four-way sticks each demand panel space and wiring, and add their own connector type — USB or dedicated inputs — to the bill. Four-player panels, dual joysticks, flight sticks, and steering wheels add a premium tier of wiring and controls. Add the encoder or interface board — the piece of hardware that translates the panel into signals your computer understands — plus USB or JAMMA wiring, harnesses, and power distribution, and the cost adds up. None of these parts announces itself, but the cost adds up.
Self-Assembly Kits vs Pre-Built Cabinets
With the panel side settled, the next decision is who does the building. A self-assembly kit costs less than a pre-built cabinet because you provide the labour. The trade is time and tolerance: kits demand careful assembly, squaring, and wiring, while pre-built cabinets arrive tested and ready to play.
Flat-packed kits are generally compact enough for standard carrier shipping, so the freight bill is smaller and there is no need to book a delivery slot. An assembled cabinet may require freight, white-glove delivery, or liftgate service, with “dozens to a few hundred dollars per unit,” so the cost is a small part of a larger delivery spend.
The build itself is not complicated, but it is real work: a screwdriver, mallet, and drill, a few hours, and careful reading of the manual pays off in a cabinet that fits together the way it should. A flat-packed kit is a deliberate choice that lowers the cost of a cabinet and gives you the ownership of building your own.
Rec Room Masters sells its cabinets as self-assembly builds, a deliberate choice that lowers cost and gives you the ownership of building your own cabinet.
There are factors buyers rarely price in, and they matter more than the headline number: replacement part availability, documentation quality, and whether a seller supports the products it ships.
Shipping, Freight, and Duties: The Lines Buyers Forget
Once you have chosen kit or assembled, logistics becomes the next variable. Most parcel carriers face limits on size, weight of the order, and the pricing that is quoted online applies only up to a certain size tier. A flat-packed kit avoids the freight class entirely; an assembled cabinet does not.
Freight quotes vary by ZIP or postal code, destination, carrier, and whether liftgate or residential delivery applies. The number you see at checkout is a starting point, not the final figure, and the difference is often a few hundred dollars.
Duties deserve care. Home video game machines and their parts fall under HTS heading 9504.50, but the applied rate depends on how the goods are described, what they are made from, and what trade arrangements are in place. Set the import category precisely and document the contents carefully, and there is less room for surprise at the border. Tariffs change, and the rate that applies on the day you buy is the rate that counts.
Import freight, customs clearance, and duty uncertainty can add a lot to the total cost, so ask any seller how they handle packaging and import formalities — and what support comes with it. Good support, faster delivery, and no surprise invoice at the door are the quiet benefits of a seller that handles the logistics well.
Emulation, Front Ends, and Legal Game Sourcing
Freight settled, software becomes the next line item. If your cabinet does not ship with a computer, budget for one. Platforms range from a low-cost single-board computer to a dedicated PC — the Xtension cabinet is compatible with PC, Mac, Raspberry Pi, Pandora’s Box, MiSTer FPGA, and consoles up to PS5 — and game performance depends on the hardware.
A PC offers the best compatibility and performance; a single-board computer is smaller and cheaper; a mini-PC sits in between. Each tier changes cost, performance, and compatibility.
Front ends are the menu layer between the user and the library. Several well-known options exist, such as Batocera, Hyperspin, and RetroPie, and each presents the games differently. Choose one that suits the games you own and the hardware you run.
Sourcing games matters, too. Licensed collections, publisher re-releases, and bundles are the low-risk route, and sourcing a commercial ROM without a licence is illegal in many countries. Read a collection’s licence before buying it.
Plan for lifetime costs. Replacement joysticks and buttons, control upgrades, and storage all add up over a decade, as does software (sourcing, administration). The cabinet is a purchase, but it is also a platform — budget for the upgrades, not just the unit.
How to Budget: Turning Cost Drivers Into a Real Number
With software and front ends accounted for, the cabinet itself becomes a budgeting exercise. Skip fantasy specs; start with the non-negotiable parts. Is it for a 4-way stick? A trackball? Four players? Do you need a specific screen size or a known control layout? List them, and the budget follows.
Read quotes as a parts list. Ask for component-level specifications — the exact panel material, button model, joystick model, encoder choice, and monitor size. That information is stated on the cabinet’s order page: it is the information the seller is prepared to stand behind, and it tells you whether two quotes are actually comparable.
Put the money where your hands go. Controls and display first — these are the parts that decide whether the cabinet gets played. Cabinet shell and finish next. Artwork and lighting last; they are visible, but they do not change how a game plays.
Before buying, confirm the following: cabinet style, panel material, joystick and button models, encoder type, monitor or TV model, shipping, warranty, support, and return policy. A seller who will not answer those questions is a seller you should not buy from.
Where to Spend More and Where to Save
Spend first where you touch and see. A better joystick or button set changes every session; a different shade of side art does not.
Cosmetics can wait. Side art, marquee lighting, and custom colours change appearance, not gameplay. A cabinet that plays well with plain panels beats a pretty cabinet that feels wrong in the hand.
Buy for the upgrade path. A standard control panel layout with swappable components lets you improve later without replacing the cabinet. A proprietary layout traps you.
Do the long-game math. Quality materials and serviceable hardware cost more initially but avoid frequent replacements. A cheap cabinet that needs parts every year is the expensive one.
The Bottom Line on Home Arcade Cabinet Cost
Three actions before you commit:
- Decide cabinet style first. It anchors panel count, material volume, and freight class; everything else follows.
- Request itemized component specs before comparing quotes. Models, materials, and encoder types are what make a quote comparable.
- Budget shipping, freight add-ons, and duty treatment from day one. Duties and freight are part of the price, not a footnote.
Above all, treat a cabinet as a long-term purchase. Weigh total cost across its service life, replacement costs, and resale value — and keep the original receipt, because resale value depends on it.
Conclusion
A home arcade cabinet’s cost is driven by five levers, style, material, display, controls, and assembly choice. None of them is a mystery. If you can answer a few concrete questions — what size do you want, how much are you willing to spend, how do you feel about assembling a kit, and which parts matter most — you can make an informed decision and avoid the most common regret, which is buying a cabinet that seemed cheap until the hidden costs arrived.
Frequently Asked Questions
What’s the honest starting price?
The Xtension upright 2-player starts at $1,095; the default trackball configuration lands at $1,195 (trackball add-on is +$100). The Xtension 32″ Vertical starts at $880. That’s the cabinet — the gaming PC and add-ons are on top.
What pushes the price up from the base?
The configurator add-ons, all verified against the live store: trackball +$100, amp and speakers +$110, pinball buttons +$75, coin door +$50 or +$80 depending on configuration, locking door +$30. A coin door only matters if you’re charging per play — skip it for a free-play home setup.
Are there costs beyond the cabinet itself?
The big one is the gaming PC that powers it — your own rig, or a pre-configured one (Arcade One sells PCs built to drop straight into an arcade cabinet).
Do tariffs change what I’ll pay?
This is genuinely in flux — the draft discusses the tariff situation with honest hedging, and the FAQ won’t do better than the article. Read the published body’s wording as final and don’t treat any number in this section as a quote.
Is a DIY kit cheaper?
Generally, yes — you’re trading your assembly time for a lower price. Rec Room Masters sells DIY kit versions alongside the assembled lines (there’s a whole Raspberry Pi kit walkthrough on the blog).
